- Kubernetes Gardener
- Bootstrapping Gardener
- Install and configure kubectl
- Access Gardener
- Creating a Kubernetes cluster
- Configure kubectl for your cluster
- Cleaning up
- Bootstrapping Gardener
Kubernetes Gardener
Bootstrapping Gardener
To set up your own Gardener, see thedocumentationor have a look at thelandscape-setup-templateproject. To learn more about this open source project, read theblog on kubernetes.io.
Install and configure kubectl
If you already have
kubectlCLI, runkubectl version —shortto checkthe version. You needv1.10or newer. If yourkubectlis older, follow thenext step to install a newer version.Install the
kubectlCLI.
Access Gardener
Create a project in the Gardener dashboard. This will essentially create aKubernetes namespace with the name
garden-<my-project>.Configure access to your Gardener projectusing a kubeconfig. If you are not the Gardener Administrator already, youcan create a technical user in the Gardener dashboard: go to the “Members”section and add a service account. You can then download the kubeconfig foryour project. You can skip this step if you create your cluster using theuser interface; it is only needed for programmatic access, make sure you set
export KUBECONFIG=garden-my-project.yamlin your shell.
Creating a Kubernetes cluster
You can create your cluster using kubectl cli by providing a clusterspecification yaml file. You can find an example for GCPhere.Make sure the namespace matches that of your project. Then just apply theprepared so-called “shoot” cluster CRD with kubectl:
$ kubectl apply --filename my-cluster.yaml
The easier alternative is to create the cluster following the cluster creationwizard in the Gardener dashboard: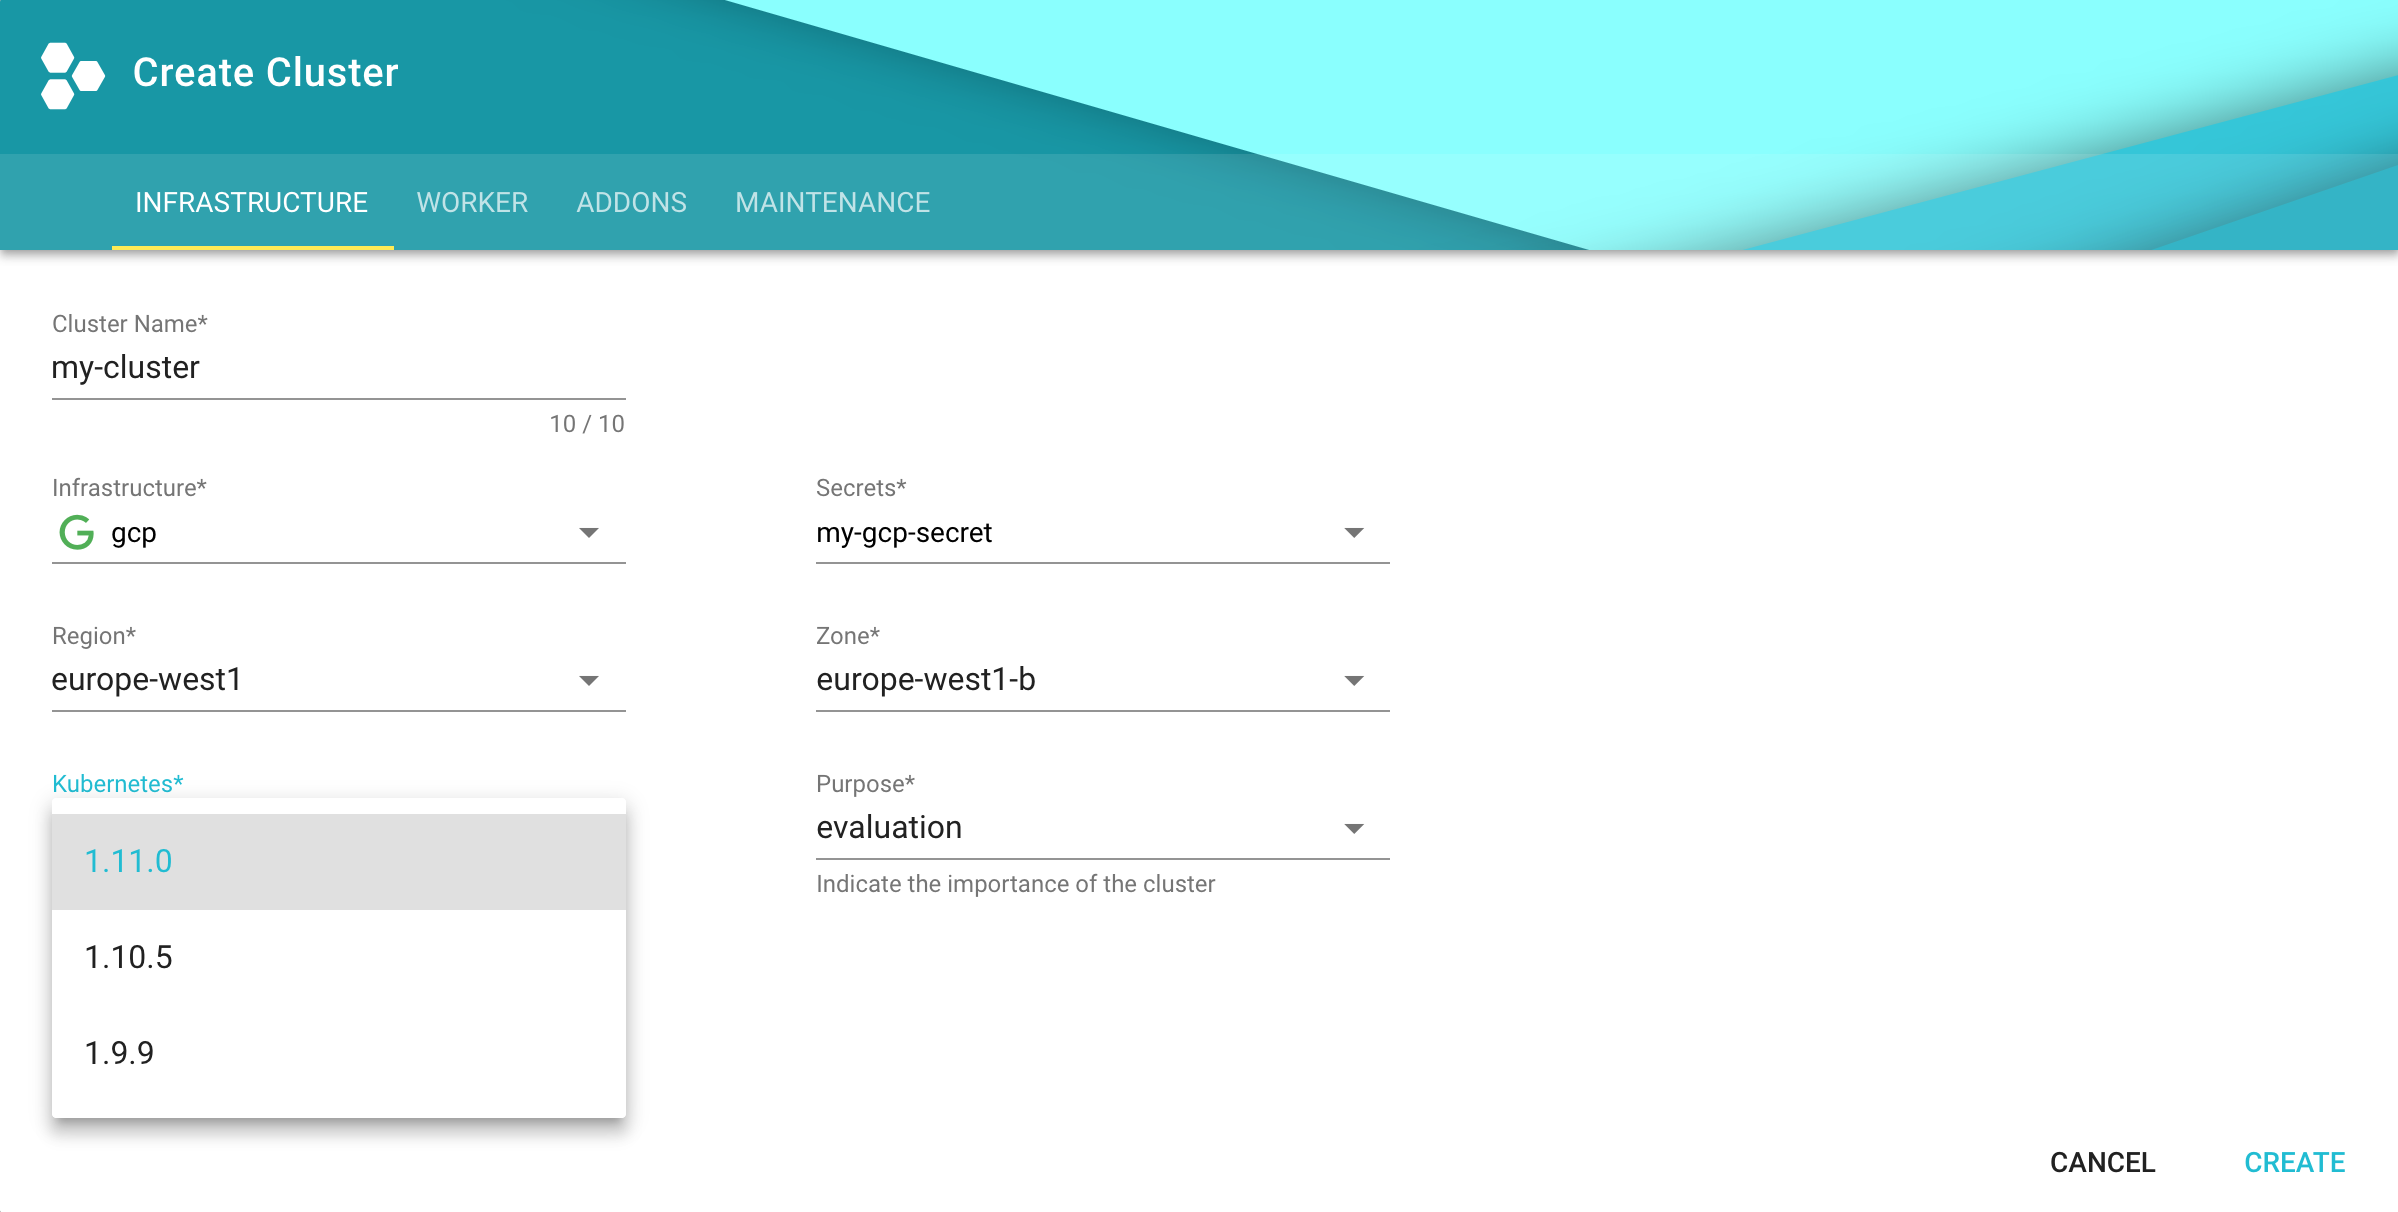
Configure kubectl for your cluster
You can now download the kubeconfig for your freshly created cluster in theGardener dashboard or via cli as follows:
$ kubectl --namespace shoot--my-project--my-cluster get secret kubecfg --output jsonpath={.data.kubeconfig} | base64 --decode > my-cluster.yaml
This kubeconfig file has full administrators access to you cluster. For the restof this guide be sure you have export KUBECONFIG=my-cluster.yaml set.
Cleaning up
Use the Gardener dashboard to delete your cluster, or execute the following withkubectl pointing to your garden-my-project.yaml kubeconfig:
$ kubectl --kubeconfig garden-my-project.yaml --namespace garden--my-project annotate shoot my-cluster confirmation.garden.sapcloud.io/deletion=true$ kubectl --kubeconfig garden-my-project.yaml --namespace garden--my-project delete shoot my-cluster
